1. To access the Request feature, navigate to the menu bar on the left side of your screen and select "Request."

2.Click on the "Create New Request" button located in the top right-hand corner to initiate a new request.

3. To include products in your request, go to Tab 1 (Products to Request):
- Click on the "Add Products" button.

- Use the "Filter" option to display products from either the inventory or catalog.
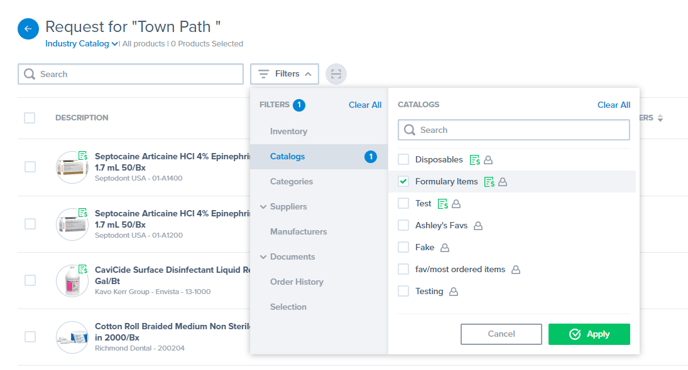
- Select products by checking the boxes next to each item.
- Click on "Add XX Products" to add all the selected products to your request.

- Click out of the modal to view your new request.
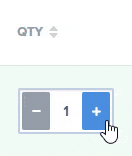
4. Adjust the quantity (QTY) for each of the products if necessary by utilizing the plus and minus signs.
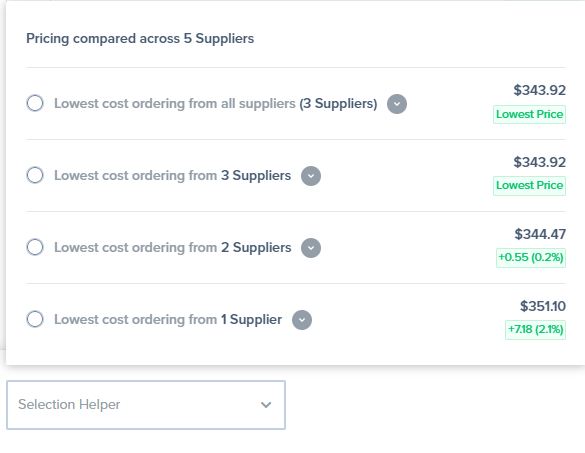
- Utilize the Cost Analysis tool to compare prices offered by various suppliers.

📝 The Selection Helper will automatically select the supplier(s) offering the lowest price based on the number of suppliers you are willing to order from.
💡 If the price difference between 2-3 suppliers is minimal, it might be advantageous to choose 2 suppliers instead of 3, even if the lowest price is shown by the 3 suppliers. This approach can potentially help reduce shipping costs and save you money.
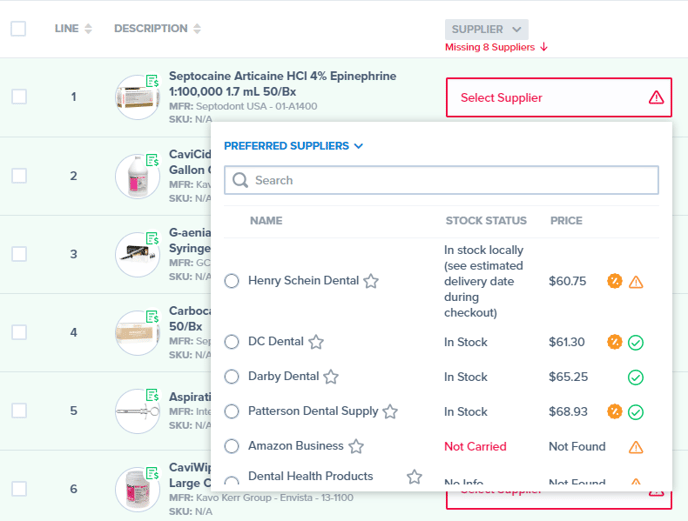
- Alternatively, you can choose a supplier for each product by selecting from the options in the supplier drop-down menu.
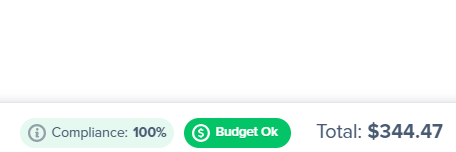
- Ensure that your order is within budget by checking the Budget Status icon located in the lower right-hand corner.

- After you have finished adding products and selecting suppliers, click on the "Review Suppliers" button located in the upper right-hand corner.

5. Next, review supplier information in Tab 2 (Supplier Info).
- Choose a contact if needed.
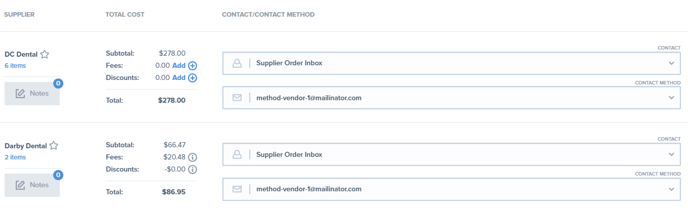
- Contact Method: The contact method will automatically populate based on the contact information provided.
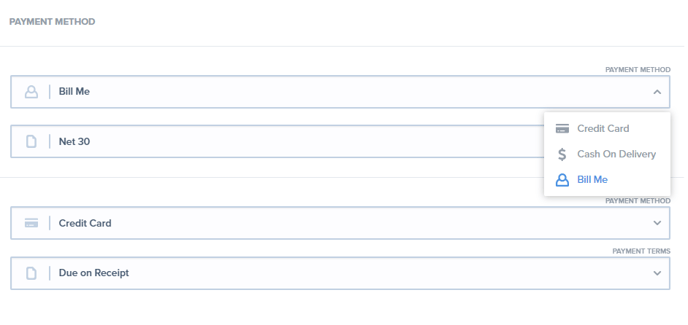
- If necessary, you can update the payment method.
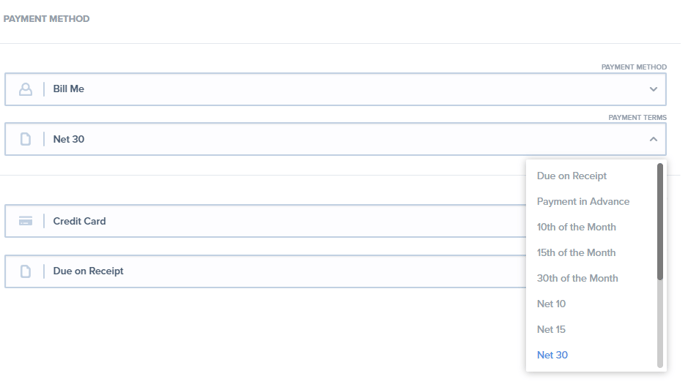
- Adjust the payment terms if necessary.
- After completing all the fields, click on the "Edit Details" button.
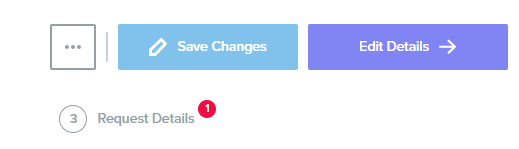
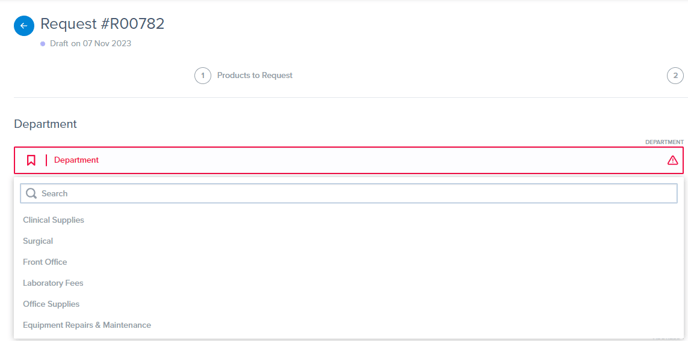
6. Next, verify the request details in Tab 3 (Request Details).
- Choose the department from the drop-down menu.
- Verify the name on the shipping address.
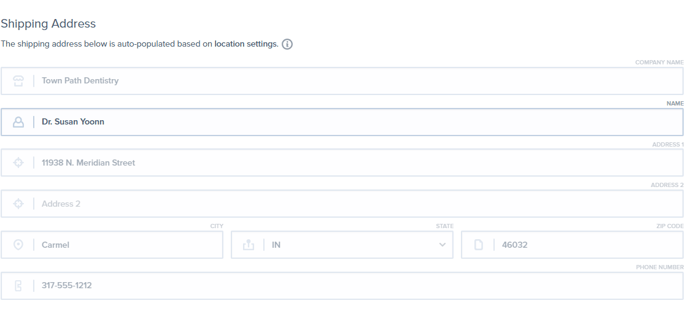
💡The name field can be edited to ensure that the shipment is sent to the correct person.
- Verify the name on the billing address.
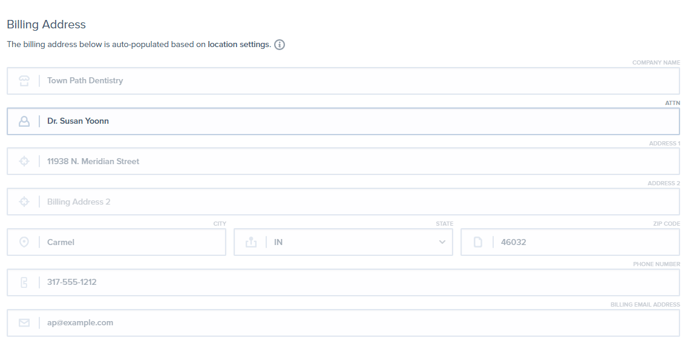
💡Again, the Attention (ATTN) field can be modified to ensure that the invoice is directed to the appropriate person, such as the Accounts Payable department.
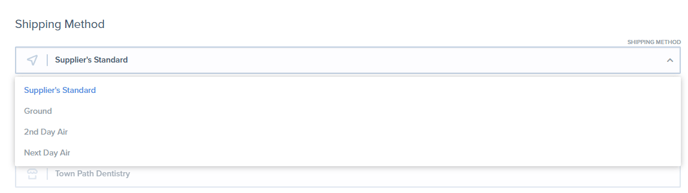
- Choose the preferred shipping method from the drop-down menu.
- Include any additional notes as needed.


📝 Supplier notes are automatically included on the Purchase Order that is sent to the supplier for their reference.
- Click on the "Submit for Approval" button. If you prefer to save your changes without submitting your request for approval, simply click on the "Save Changes" button.

📝 The designated approver will receive a notification that the request has been submitted for approval. The status of your request will show as "waiting for approval".