Best Practice for Receiving
Receiving is an essential process that involves accurately recording and confirming the quantity of products that have been shipped to the designated location. This action is crucial as it directly impacts inventory management, payment processes, and invoicing procedures.
Upon the arrival of a shipment, you will have the capability to perform a three-way match, comparing the supplies in the box, the Purchase Order, and the invoice.
📝 To ensure the accuracy of the shipment, it is important to record the quantity received for each item ordered. This helps to confirm that the shipment is correct.
If any items are received in a damaged condition, you have the option to reject the damaged products in order to escalate and resolve the issue promptly. Furthermore, you can initiate returns and upload photos of the damage to conveniently store all the necessary evidence in one place.
How to Receive Products
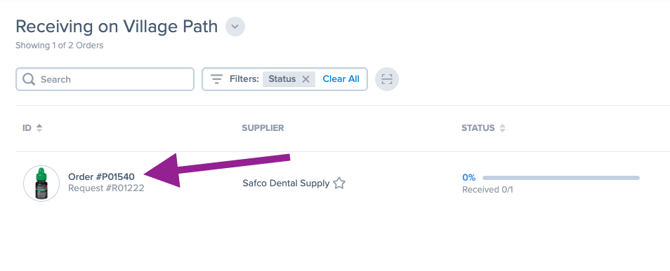
1. Navigate to the Receive option in the Menu Bar located on the left side of your screen. This will lead you to the Receive summary page, where you will have access to view all the Purchase Orders currently being received.

2. Select the Purchase Order you are wanting to receive.
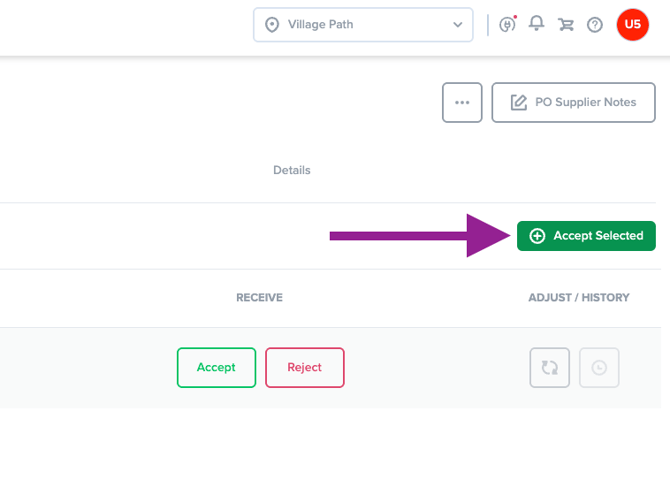
3. Accepting All Products
- Utilize the multi-select feature, which conveniently selects all line items within the purchase order with just one click.

- Click on Accept Selected.
4. Accepting Items Individually
- To accept a line item, simply click on Accept. Adjust the quantity to be accepted and click on the green check mark icon to confirm.

- Adjust the quantity by using the up/down arrow.

5. Rejecting Missing or Broken Items Individually
- Select the Reject option for a specific line item.

- Specify the quantity to be rejected, select the reason for rejection, choose the desired action from the supplier, add any notes or attachments, and click on the Browse button to upload any relevant images. Finally, click on the Reject Product button to proceed with rejecting the product.

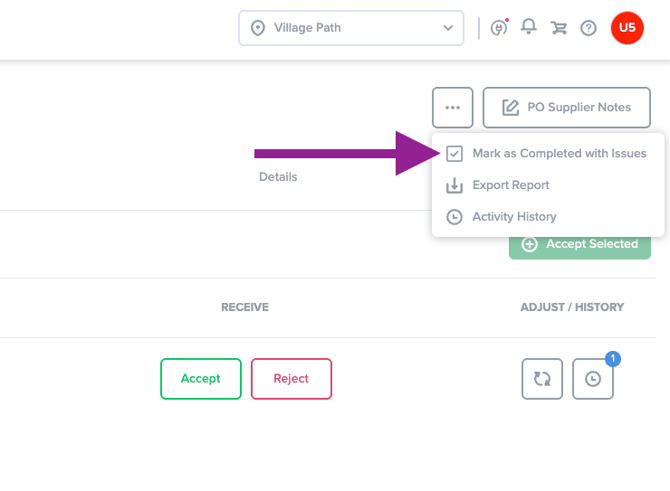
6. To complete receiving when you have rejected at least one item, click on the three dot menu located in the top right corner of your screen. Next, click on “Mark as Completed with Issues.”
📝
Additional Features
1. View the history log to review received details of each line item.
- Click on the Clock Icon located under the Action section.


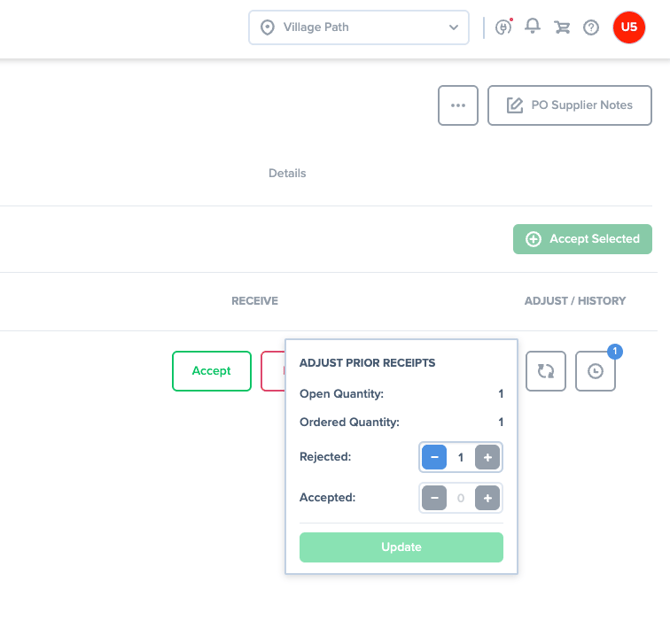
2. Adjust previously rejected or accepted items
- Click on the reverse icon and make any necessary adjustments.

3. Add Packing Slip Attachment
You have the option to attach packing slips for the purpose of record keeping.- Select the Details tab.
- Drag and drop files or browse to select the picture.
